Printers provide an essential service in both office and home environments. While these machines often sail smoothly through documents of all types, they still require routine maintenance to ensure consistent print performance and longevity. Among the most prominent care procedures is proper cleaning, a task that varies depending on the printer at hand. In this informative guide, we delve into specific cleaning procedures for various printer types including inkjet, laser, and thermal, highlighting how their differences in mechanics and ink or toner storage impact their cleaning methods. Additionally, we outline suitable techniques on how to clean the exterior of your printer without inflicting damage and how to clean the often problematic printer components for inkjet and laser printers.
Understanding Printer Types
Understanding Printer Types
While there might be a plethora of printer types available on the market, they mainly fall into three categories: inkjet, laser, and thermal printers. Each of these printers has unique features and capabilities, which determine their cleaning process.
Inkjet Printers
Inkjet printers work by spraying tiny jets of ink onto paper. This type of printer has one or more cartridges that are filled with liquid ink. The cartridges are usually situated behind a lid on the front or top of the printer. If an inkjet printer is not used regularly, a phenomena inkjet printers are infamous for, it may lead to clogging of the print heads. The ink inside the cartridge, due to lack of use, dries up and thickens — this blocks the small jets and results in faded, streaky prints. Cleaning such printers would require you to use the automatic cleaning function of the printer first. If unsuccessful, manual cleaning with a soft, lint-free cloth lightly moistened with distilled water or special cleaning solutions is recommended.
Laser Printers
Laser printers use a different method to produce an image. Rather than using liquid ink, they use a toner cartridge filled with fine powder and a heated fuser. The location of the toner varies with different models but it is typically found behind the front panel of your printer. Compared to inkjet printers, laser printers are less likely to have clogged print heads, but they do get dirty and fill up with loose toner over time. Cleaning them involves removing the toner cartridge and using a dry microfiber cloth to clean the inside carefully. Canned air can also be used to remove loose toner dust.
Thermal Printers
Lastly, thermal printers don’t make use of ink or toner at all. Instead, these printers use heat to burn images onto special heat-sensitive paper. The printing elements that generate heat are located in the printer head that moves across the paper. Thermal printers are generally cleaner as it doesn’t involve any ink or toner. Yet, their cleaning process would involve using a cleaning swab or card specifically designed for thermal printers, to remove any residue or dust on the printer head.
Each printer type requires unique care and cleaning methods. By understanding where the ink or toner is stored, and how the printer works, you can maintain and extend the life of your printer.

Cleaning Exterior of Printer
Unplug the Printer
The first step in cleaning the exterior of your printer is to ensure your safety. Always unplug the printer before cleaning. This will prevent any electric shock while cleaning and also protect the internal components of the printer from potential damage.
Remove Excess Dust
Now, it’s time to remove the excess dust from the surface of your printer. To do this, you’ll need a soft, lint-free cloth. Microfiber cloths are a good choice as they pick up and hold dust well. Get your cloth and gently wipe down the exterior of your printer. Try to remove as much dust as you can with the dry cloth.
Hard-to-Reach Spots
For hard-to-reach spots, consider using a small, soft brush or a can of compressed air. A small brush can effectively remove dust and debris from small crevices and the air vents of your printer. A can of compressed air, when sprayed onto these areas, can help dislodge any remaining particles.
Using Cleaning Solutions
Once dust and debris are dealt with, focus on stubborn stains and spots. You’ll need a mild cleaning solution for this task. Avoid using harsh chemicals like bleach or ammonia-based cleaners as they can damage the plastic exterior of the printer. Instead, you can use a slightly damp cloth with mild soap or isopropyl alcohol.
Before cleaning the entirety of the surface with the solution, it’s advisable to do a patch test. Test the solution on a small, less noticeable area of the printer and let it dry. If it doesn’t discolor or damage the surface, it is safe to use.
Dampen your cloth with your chosen cleaning solution. Then, gently wipe the surface of the printer. Again, do not spray the solution directly onto the printer to avoid excess moisture.
After you are done with the cleaning process, dry the printer thoroughly with another soft, dry cloth. Make sure no moisture remains as it might lead to interior damage once you power it on.
Finishing Up and Regular Maintenance
Take the time to ensure that the printer is fully dry before plugging it back in. Regular cleaning of your printer’s exterior can elongate its lifespan and prevent any blockages that might interfere with its productivity. Depending on the level of usage and the environment, a monthly clean could be beneficial. Routinely examine the printer for dust, stains, and adherence to prevent any persistent dirt buildup.
Remember, safety is paramount.
Always unplug the printer before proceeding with any cleaning task to ensure your safety and preserve the integrity of your equipment.

Cleaning Inkjet Print Head
Identify the Printer’s Print Head
The first step to cleaning an inkjet print head involves locating where the print head is on your specific printer model. Normally, it is located under the printer’s cover in the interior. Always ensure the printer is completely powered off before starting the cleaning process to avoid electrical shocks or malfunctions.
Removing the Print Head
Before removing the print head, consult with your printer’s manual as each model may have a different removal method. Typically, it involves lifting a latch on the carriage to loosen the print head. Gently lift it out, avoiding contact with the metal contacts or ink ports.
Prepare a Work Area
When cleaning the print head, it’s a good idea to protect the work surface. Lay down layers of paper towels or a disposable cloth on top of a hard, flat table or desk to prevent ink stains. Always wear gloves to protect your hands from getting stained as well.
Cleaning with Isopropyl Alcohol
Obtain some isopropyl alcohol (70% or higher) and some cotton swabs or a soft cloth. Dip the cloth or cotton swab into the isopropyl alcohol and gently clean the print head, focusing on the places where the ink comes out. Isopropyl alcohol is safe for the print head as it evaporates quickly without leaving behind any residue.
Do Not Force or Scrub the Print Head
As you’re cleaning, it’s important not to force anything. Never scrub the print head, as this can cause damage. If the ink doesn’t come off with gentle wiping, let the print head soak in the isopropyl alcohol for a few minutes before wiping it again.
Let the Print Head Completely Dry
After the print head has been thoroughly cleaned, it’s vital to let it dry completely before reinserting it. Depending on how soaked it got during cleaning, this could take anywhere from an hour to overnight.
Reinstall the Print Head
Finally, once the print head is entirely dry, reinstall it in the printer. Again, the procedure will depend on the specific printer model, so double-check the manual if needed. After reattaching the latch on the carriage (if applicable), close up the printer and power it back up. Now your printer should be clean and ready to produce clear prints once again.
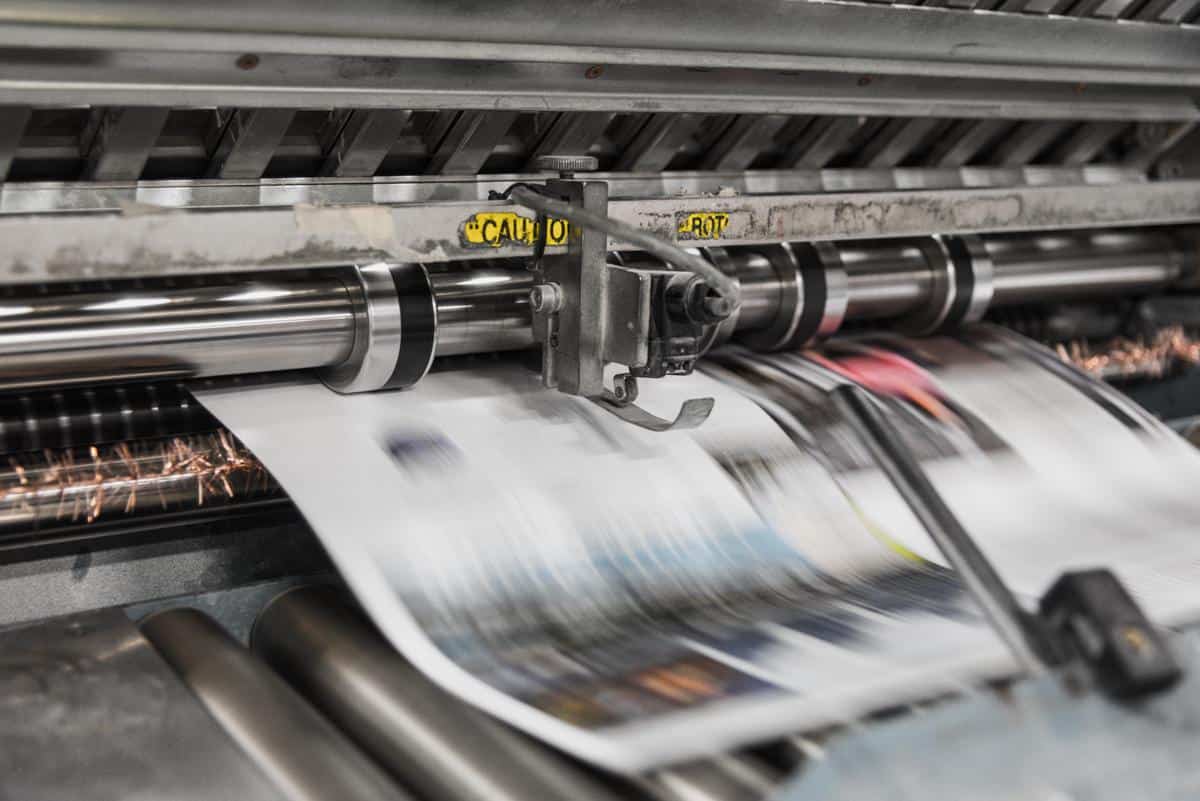
Photo by bank_phrom on Unsplash
Cleaning Laser Printer Components
Safety Measures Before Cleaning a Laser Printer
Before cleaning your laser printer, certain safety precautions are necessary. Always unplug the printer from the electrical source to avoid any electric shock. Avoid troubling the toner cartridge, as the toner powder can be harmful if inhaled or if contact with skin occurs. If the toner accidentally spills, never try to clean it using a regular vacuum cleaner. It can cause the fine toner particles to be blown into the air and be scattered. Use a toner vacuum instead.
Cleaning the Exterior of the Laser Printer
Start by cleaning the outside of the printer. Use a soft cloth or a dust cloth to wipe the exterior of the printer. Also, use a can of compressed air to remove dust particles from crevices and buttons.
Cleaning the Toner Cartridge
Access the toner cartridge by opening the printer cover. Depending on the type of printer, you might need to remove certain parts or release latches. Once the cartridge is accessible, carefully removed it. Wipe the cartridge with a toner cloth or a soft dry cloth to get rid of accumulated dust or loose toner particles. Be careful not to shake the cartridge.
Cleaning the Interior Components
Once the toner cartridge is removed, the interior components of the printer are practically available for cleaning. Use a toner vacuum to remove dust and loose toner particles around the interior of the printer. Carefully clean the rollers, but avoid touching them with your hands to prevent oils and dirt from your fingers from damaging them.
Cleaning the Corona Wire
Inside a laser printer, there is a thin wire, known as a corona wire, which plays a crucial role in the printing process. Over time, this wire can accumulate dust and other particles, affecting the performance of your printer. Use a corona wire cleaner or a dry cotton swab to clean this wire gently. Avoid applying too much force as the wire is delicate and can easily be damaged.
Remember to wait for a few minutes after cleaning before plugging the printer back into the electrical source. It allows the moving parts and components you’ve cleaned to settle into place properly. Regular cleaning of your laser printer can extend the lifespan of the device and maintain its performance.

After equipping yourself with the various practices for cleaning different printer types, remember that the key to regular and effective printer maintenance is consistency. Regular cleaning not only helps maintain print quality but may extend the operational life of your critical components. Knowing how to properly clean your printer’s exterior and internal components, including the inkjet print head and the laser printer’s toner cartridge, can spare you expensive repair or replacement costs. Make printer maintenance a habit because a clean machine not only looks good, but performs even better, keeping your documents crisp, clear, and professional for the long-term.